Most users have ever lost data that stored on local storage due to hardware damage, system crashes, theft, natural disasters, etc. Therefore, cloud storage has become a more popular storage choice because it keeps data far away from local hardware and provides huge storage space as long as you pay for its plans.
Nowadays, more and more users store their data on cloud storage for safekeeping. Considering the data security, you are suggested to backup data even on cloud storage because data on cloud storage are also at risk of losing for technical or human errors. Meanwhile, you’d better backup cloud storage data to another cloud storage directly so that you can save local storage.

Speaking of cloud to cloud backup, the most common way that many users may know is downloading and re-uploading between cloud storage. Actually, although this way is feasible, it may be time-consuming when there are a large number of files need to move. In fact, the easiest way to do cloud to cloud backup is to rely on a professional cloud to cloud backup service like cBackupper.
Best Cloud to Cloud Backup Service – cBackupper
cBackupper is a free, professional and popular cloud backup service in the market, which focuses on cloud to cloud backup. You can create a cBackupper account and sign in to enjoy many useful features and advantages as below:
Simple backup. cBackupper supports multiple mainstream cloud storage like OneDrive, Dropbox, Google Drive and so on. You can add your accounts that belong to one or different cloud storage. After adding, you can create a backup task to backup files between cloud storage accounts you added easily and quickly.
Easy to use. cBackupper is a web-based service so you can use it directly through a browser as long as you have internet connection. Since it is web-based service, you don’t need to download or install any app and there is no limitation on the devices and operating system you are using.
Backup Schedule. You can choose to set up scheduled backup in specific time, daily, weekly, or monthly according to your needs. Then, data will be backed up automatically at regularly intervals to save the storage space and the backup time.
Flexible backup settings. There are many useful backup settings that can save both backup time and storage space. For example, you can use File Filter feature to exclude the file type you don’t need. And Email Notification feature can be enabled notice you the backup result.
Fast Speed and high security. By comparison, cBackupper offers faster speed than other cloud backup tools. And it bases on standard OAuth system, which can ensure your account’s security. You don’t need to worry about personal information data disclosure.
How to Use cBackupper Step by Step?
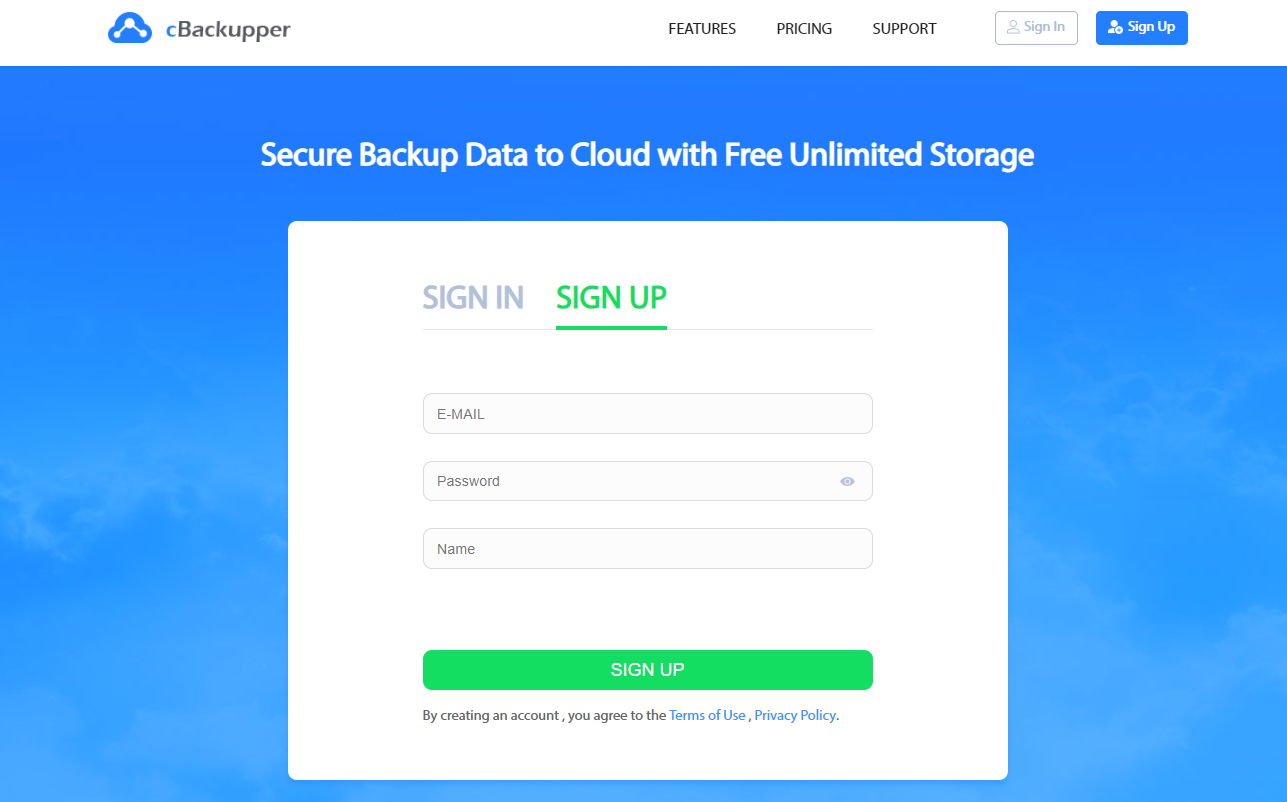
Step 1. Directly go to the website of cBackupper, click “Sign up” at the upper right side, then type your email, password, and name to create an cBackupper account and sign in.
Step 2. After logging in, you will see the “Clouds” page of cBackupper. Click “Add Clouds” button and choose a cloud and then click on “Add”. Then, you will be guided to sign in your account of this cloud storage.
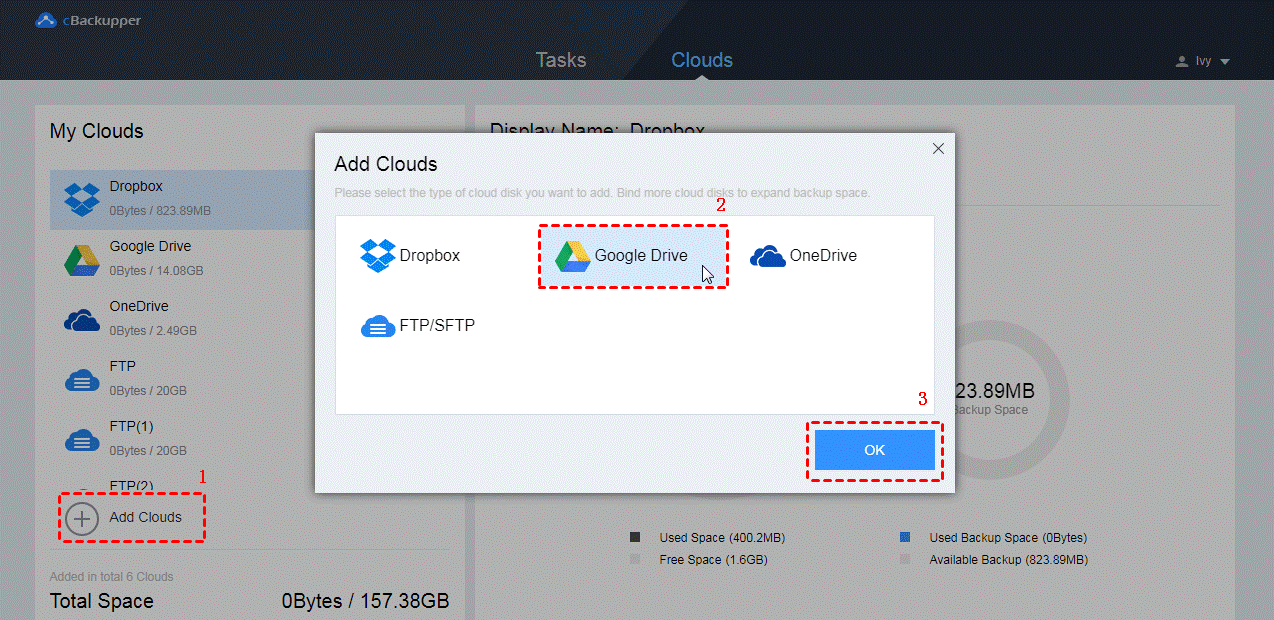
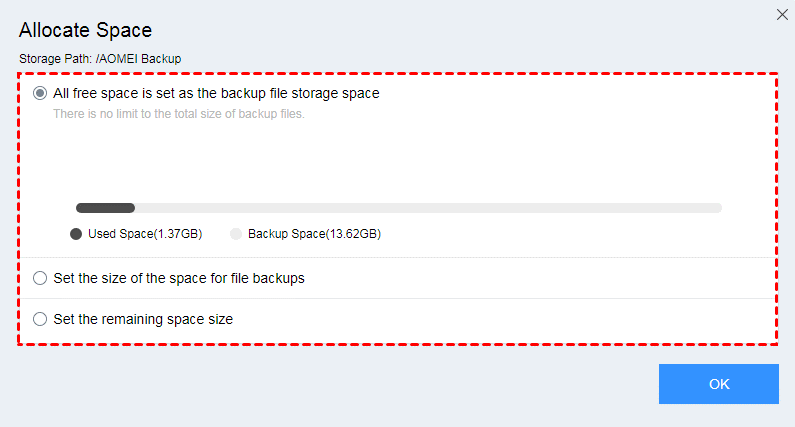
Note: Follow the steps above, you can add as many accounts as you have. All the added cloud drives will be listed on the left side of the page. Next to each cloud drive, there is a three-dot icon. Click it and select “Allocate Space” option, you can adjust the storage space according to your needs.
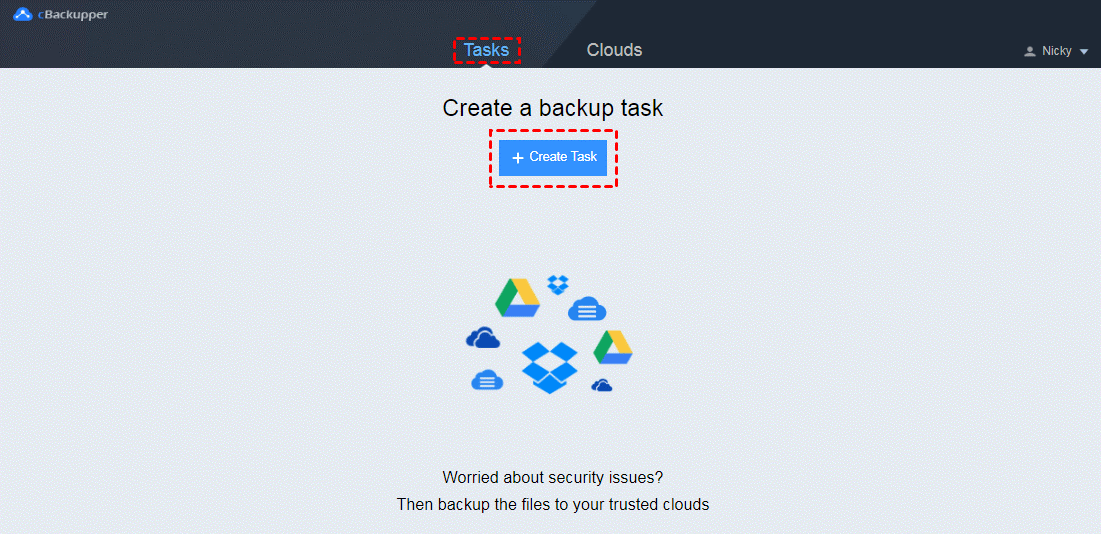
Step 3. Switching to another page by clicking on “Tasks” tab at the top of the page. In this page, click “Create Task” button to create your backup task.
Step 4. You can edit the task name in order to distinguish the tasks. Click “Add Source” button on the left to choose one cloud storage as the backup source. And click “Add Destination” on the right to choose another cloud storage as backup destination.
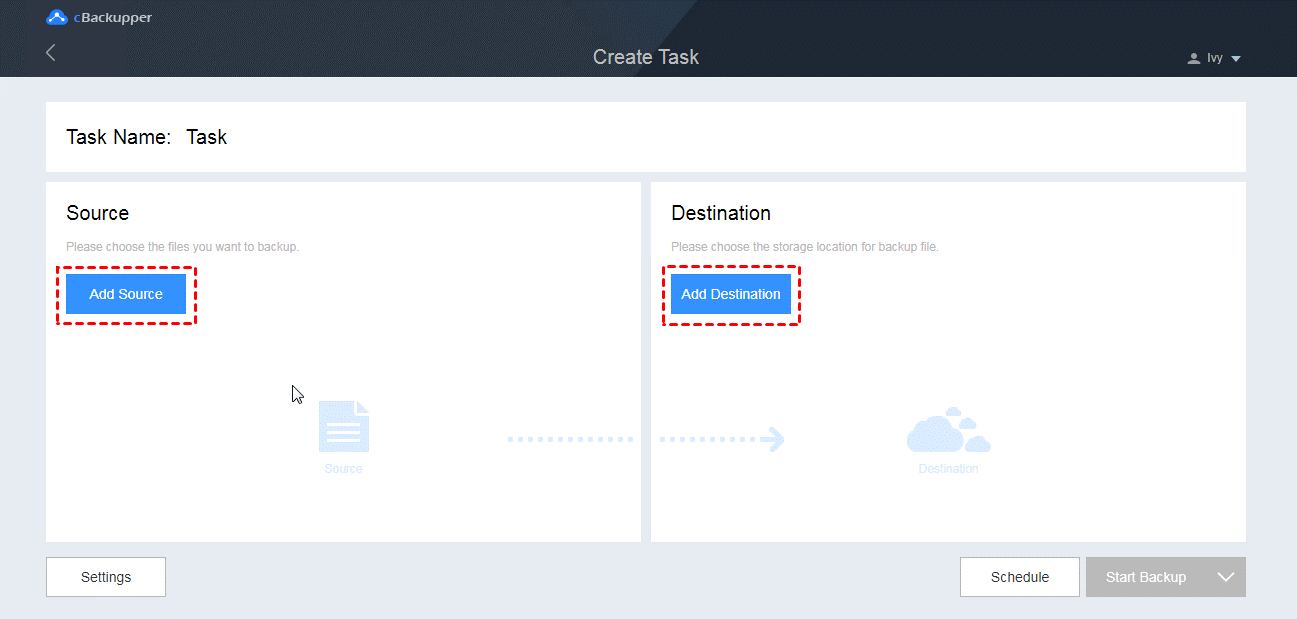
Note: When you choose the backup destination, you can tick “Secondary Destination” option to choose a secondary backup destination for your task. If the space of your first destination is insufficient, files will be automatically backed up to the second one.

5. After setting, click “Start Backup” in the lower right corner to execute the task.
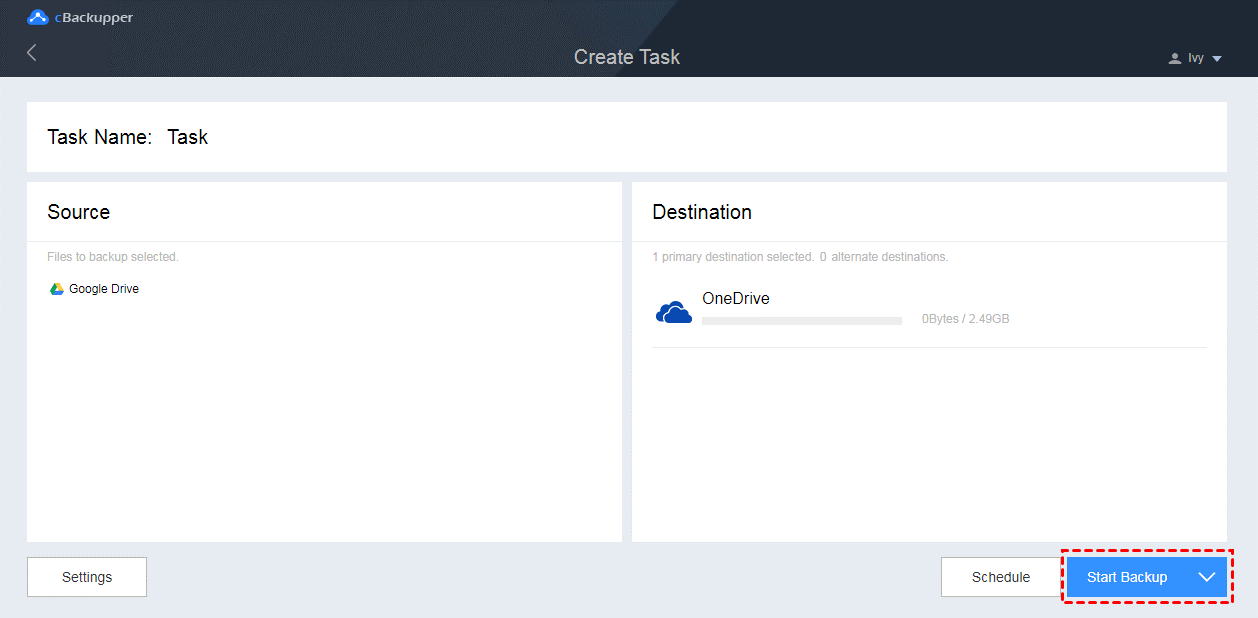
Note: “File Filter” and “Email Notification” features are under “Settings”. Scheduled Backup is under “Scheduled”.
Final Words
According to the contents above, you must have a very comprehensive understanding of cBackupper. It is indeed the best cloud backup service that can help you back up files between cloud storage easily and quickly and offers many useful features. What’s more, it is free, if you need to do cloud to cloud backup, why not give it a try?


